
Scrimshaw is one of those collectible worlds where the “how” matters just as much as the “what.” A carved tooth isn’t only about the scene on the surface—it’s also about the material beneath it, the tools that made the lines, and the shipboard ingenuity that turned whaling byproducts into folk art.
For collectors, learning materials and techniques pays off in three ways. First, it helps you appreciate what you’re holding (scrimshaw is often more labor-intensive than it looks). Second, it helps you describe pieces accurately. And third, it gives you a sharper eye when you’re comparing examples—because different materials age differently, and different techniques leave different “handwriting” in the lines.
This post is a tour of the traditional scrimshaw maker’s toolkit: what whalers used, how they prepared the surface, how they transferred designs, and how they got those dark lines to pop against ivory and bone.
The Classic Materials: What Scrimshaw Was Made On
When people picture scrimshaw, they usually picture a sperm whale tooth—and for good reason. Whale teeth were abundant on whaling voyages and could be polished smooth, making them ideal for engraving. But scrimshaw wasn’t limited to teeth. Whalers and mariners decorated a range of durable materials that were available onboard or acquired through trade.
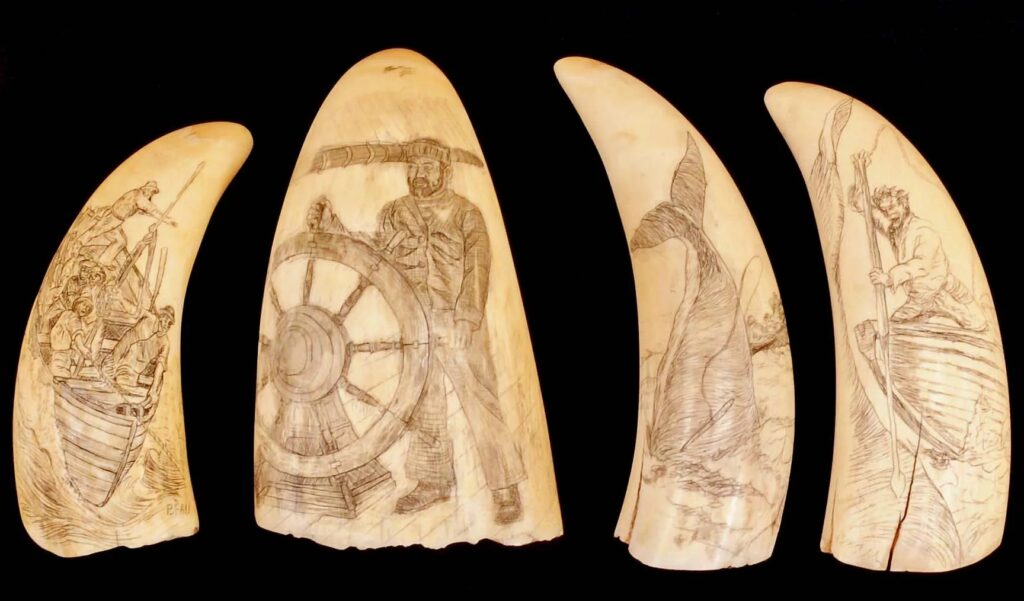
Sperm whale teeth (the “iconic” scrimshaw canvas)
Sperm whale teeth are dense and can take a high polish, which is why they became the most recognizable scrimshaw surface. They also have a natural curve that makes certain compositions—ships at sea, portraits, compass roses—look especially dramatic.
Collector note: Teeth often show a natural gradient in color from crown to root, and you’ll frequently see age-related mellowing (a warm, creamy tone) on older examples.
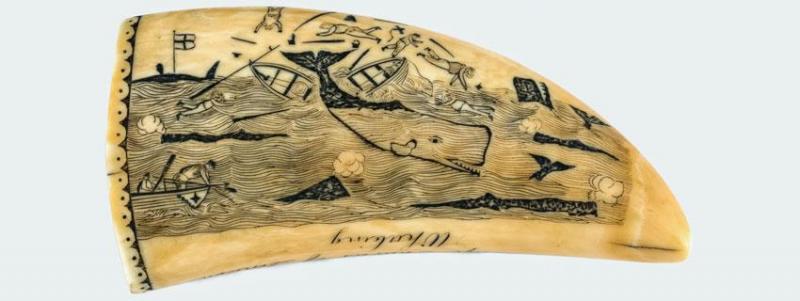
Whale bone (including “panbone”)
Whale bone was used for both flat panels and functional objects (like the famous corset busks). Flat bone surfaces gave scrimshanders a larger “page” to work with than a tooth, which is part of why you’ll see more expansive scenes or multi-panel storytelling on some bone pieces.
Collector note: Bone pieces can show more visible grain and porosity than tooth, and the surface may not take quite the same glassy polish. That’s normal—and part of the character of the medium.
Baleen (flexible and distinctive)
Baleen is a different experience entirely. It’s keratin (not bone), and it was often cut into strips for items like busks or other slender forms. Scrimshaw on baleen can look especially graphic because the material itself has a darker, layered look compared to tooth.
Collector note: Baleen is more prone to warping if stored in fluctuating humidity, so stable conditions matter.
Walrus ivory (often via Arctic routes)
Walrus tusk ivory appears in scrimshaw collections, particularly where mariners had access through Arctic contact and trade. The material can be beautiful—often with different internal patterning than whale tooth.
Collector note: Walrus ivory can show distinctive internal structure when viewed at cut ends, but many scrimshaw objects don’t expose those ends clearly. When they do, it can be an interesting material clue.
Shipboard Tools: Simple, Sharp, and Improvised
Scrimshaw is proof that you don’t need an art studio to make art—you need time, patience, and a point that holds a line.
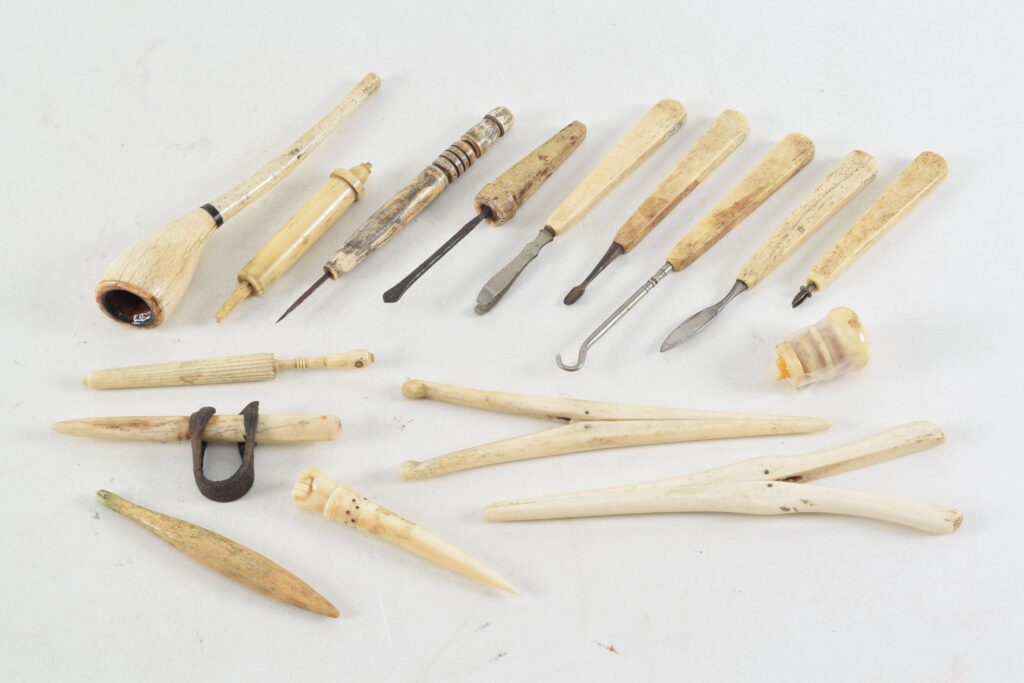
Whalers typically worked with:
- Sail needles
- Awls
- Pocketknives / jackknives
- Homemade engraving points fashioned from available metal
These weren’t specialized artist tools in the modern sense. They were everyday shipboard items repurposed for detail work. A needle could create fine lines and tiny dots; a knife point could carve deeper grooves or define heavier outlines.
Collector note: Tool choice affects the “feel” of the work. Needle work often reads as delicate and precise. Knife work can look bolder, sometimes more rustic—especially in lettering.
Step One: Preparing the Surface
Before a single line could be engraved, the scrimshander had to make the surface workable.
Cleaning and smoothing
Raw teeth and bone weren’t magically ready for art. They had to be scraped, sanded, and polished to create a smooth surface that would take fine lines and hold pigment cleanly.
On a ship, this preparation could be time-consuming. Smoothing is one reason scrimshaw has that special satisfaction: the maker didn’t just draw a picture—they transformed the material itself.
Collector note: Surface preparation sometimes leaves subtle flattening or “worked” areas, especially on teeth, where the artist created a smoother panel for the design.
Creating a “canvas” on a curved tooth
Teeth aren’t flat, so scrimshanders worked with the curve. Some designs wrap with the tooth’s shape; others sit in a framed panel, as if the tooth were a miniature scroll. Where the design is placed can affect how it reads—straight-on, it may look centered, but turned slightly, the scene may “open up.”
Planning the Design: Freehand vs. Transfer
Not every sailor was a natural draftsman, and scrimshaw has always included both confident freehand work and clever shortcuts.
Freehand drawing
Many pieces were simply drawn directly with the engraving point. Freehand scrimshaw often has an energy you can feel—confident ship profiles, stylized waves, bold eagles, lively lettering.
Collector note: Freehand work can show small corrections—slight changes in line direction or re-etched outlines. These aren’t flaws; they’re evidence of the human hand.
“Prick and connect” transfer methods
Some scrimshanders used a method that’s essentially a 19th-century tracing hack: attach or hold a printed image to the polished surface, prick the outline with a needle, then remove the paper and “connect the dots.” This allowed sailors to copy a picture accurately even without strong drawing skills, and it’s one reason some scrimshaw looks surprisingly sophisticated.
Collector note: Transfer-based work can sometimes show a very consistent outline style, with dot patterns or evenly spaced punctures that guided the linework.
Engraving Styles: Lines, Dots, and Shading
Scrimshaw is not just “scratched lines.” There are recognizable techniques that scrimshanders used to build depth and texture.
Line engraving
This is the foundation: outlines, borders, lettering, rigging lines, horizon lines. Line quality can tell you a lot about the maker—steady, delicate lines suggest patience and practice.
Cross-hatching and shading
To create shadow and form, scrimshanders often used cross-hatching (crisscross lines) or layered line density. You’ll see this on sails, coats, faces, hair, and sky.
Collector note: Shading tends to separate the “casual” pieces from the truly ambitious ones. If you see subtle tonal work—especially in portraits—that’s a sign of real time invested.
Stippling (dot work)
Dot patterns can create gradients and texture without heavy lines. Stippling is especially effective for sky, sea texture, or soft shadows.
Collector note: Stippled areas often hold pigment differently than line areas, creating a soft, velvety look when inked.
Making the Image Visible: Pigments and “Inking”
Engraving alone doesn’t create contrast. The magic happens when pigment settles into the incised lines.
Traditional scrimshaw makers commonly used:
- Lampblack / soot (often from ship lamps)
- Ink when available
- Tobacco juice
- Tar
- Other dark, oily pigments that could be rubbed into grooves
The process was straightforward: rub pigment over the engraving, let it settle into the lines, then wipe the surface clean so the pigment remains only in the cuts. The result is that classic dark-on-light scrimshaw look.
Collector note: Different pigments can leave different tones—some lines read as deep black, others as warm brown. That variation can be completely authentic and period-appropriate.
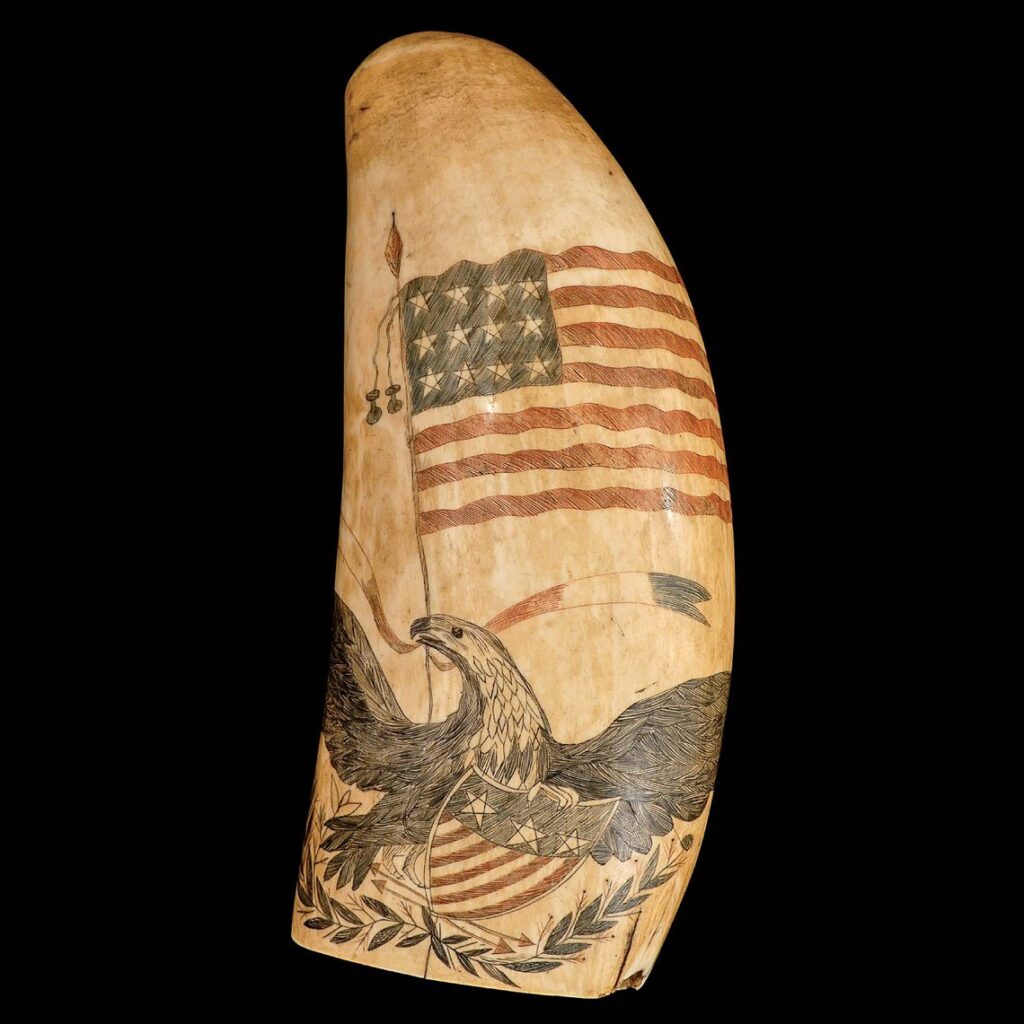
Polychrome scrimshaw (color beyond black)
While many collectors think of scrimshaw as monochrome, some pieces used colored pigments as well. Color could highlight flags, clothing, borders, floral motifs, or decorative framing. Polychrome work can be especially eye-catching, and it often signals either a maker with extra ambition or access to more materials.
Collector note: Color can fade with light exposure. If you see surviving color, it’s worth protecting from bright display conditions.
Finishing Touches: Wipe, Polish, and Presentation
After inking, scrimshanders typically wiped and polished the surface again to bring back the shine and remove any haze. Some pieces were then fitted into frames, incorporated into tools, or turned into gifts and trade items.
This is where scrimshaw becomes more than a picture: it becomes an object meant to be held, used, or displayed. Even when a piece is purely decorative, you can often sense the maker thinking about how it would look in someone’s hand back home.
Collector note: Look at how the piece is “composed” for viewing—does the tooth sit naturally so the scene faces forward? Is there a base or stand? Is the engraving placed where it reads best? Those choices often reflect intent: souvenir, gift, trade item, or personal keepsake.
Technique Clues Collectors Notice Right Away
When you’re looking at scrimshaw in the wild—estate sales, antique malls, online listings—these are quick technique cues that can help you read a piece:
- Surface quality: very smooth and glossy vs. more matte and porous
- Line depth: faint hairlines vs. deeper, bolder cuts
- Shading method: cross-hatching vs. stippling vs. mostly outline-only
- Pigment tone: deep black vs. warm brown vs. hints of color
- Composition: centered “display panel” vs. wraparound curvature use
- Lettering style: careful script vs. simple block letters
You don’t need to judge a piece as “good” or “bad” based on these traits—scrimshaw spans everything from casual sailor doodles to astonishing artistry. But recognizing the technique helps you understand what you’re seeing and describe it with confidence.
Why the Technique Matters to the Story
Scrimshaw is often called a sailor’s folk art, but it’s also a record of problem-solving. Imagine trying to engrave a detailed ship scene using a sail needle while the deck shifts under your feet, making your “ink” from whatever dark substance you can find onboard, or polishing a tooth smooth enough to become a miniature art panel, with nothing but patience and time.
That’s why collectors fall for scrimshaw: the finished piece is the visible part, but the technique tells you what it cost in attention and care. It’s history you can literally see in the marks.
Let’s Make History—one engraved line at a time.